Appearance
📱 Connect to WhatsApp
Connect your WhatsApp Business Account to the platform so you can use core messaging features such as chats, templates, broadcasts, and more.
- Start this flow after sign-up and company creation
- Make sure you are signed in and have an active company selected
- You must be an admin on the WhatsApp Business Account you want to connect
🚀 Start The Connection Flow
Once your account and company are ready, continue to the WhatsApp integration flow.
This onboarding process helps you:
- Connect an existing phone number
- Or request a virtual number if you do not already have one
- Complete the Meta connection process
☎️ Choose Your Number Setup
The platform asks whether you already have a phone number for your WhatsApp Business Account.
If You Already Have A Number
- Select Yes
- Continue directly to the connection step
If You Need A Number
- Select No, please provide one for me
- Continue to the virtual number step
Important
- If you want to use your own number, it must not already be connected to another WhatsApp account or integration
🌍 Request A Virtual Number
If you do not already have a phone number, the platform can provision one for you.
- Choose your country
- Click Submit
- Wait for the virtual number to be generated
Once the number has been created, it will be shown on screen and you can continue to the next step.
What To Expect
- The verification code for the number will be sent to your email address
- You should keep an eye on your inbox while completing setup
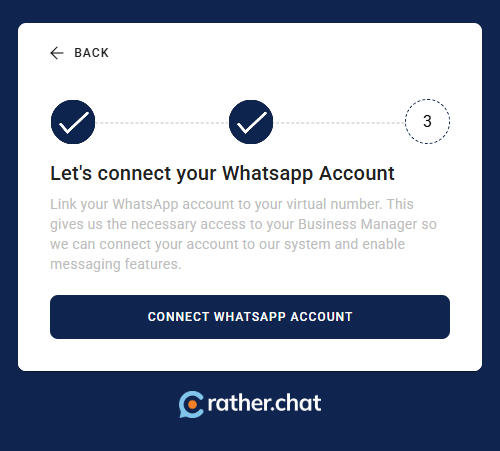
🔗 Connect Your WhatsApp Business Account
When you reach the connection step, click Connect WhatsApp Account.
This opens the Meta embedded signup process so you can connect your WhatsApp Business Account to the platform.
During this step, Meta may ask you to:
- Log in to Facebook
- Choose or create a WhatsApp Business Account
- Confirm the business details
- Confirm the phone number you want to use
- Complete the WhatsApp setup steps required by Meta
If the connection does not complete successfully, the platform may show a Retry option.
🖼️ Step-By-Step Walkthrough
1. Start The WhatsApp Connection
Click Connect WhatsApp Account to begin the Meta embedded signup process.
2. Log In To Facebook
If prompted, log in to Facebook again to continue securely with the connection flow.

3. Review The RatherChat Integration Screen
Read through the connection overview, then click Continue to proceed.

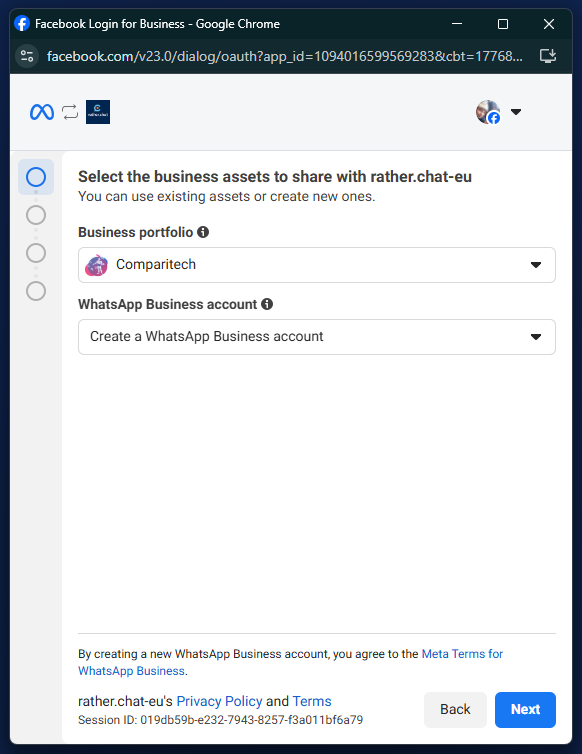
4. Select Your Business Assets
Choose the business portfolio you want to use and select or create the WhatsApp Business Account you want to connect.
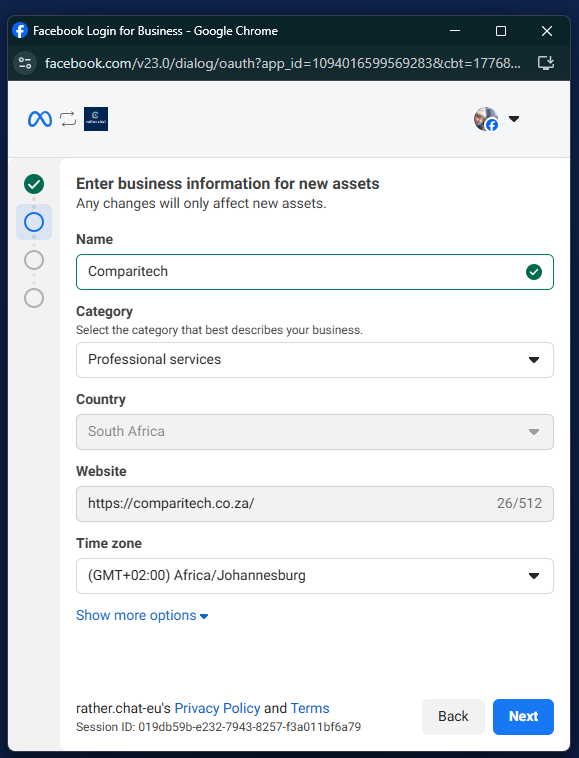
5. Enter Your Business Information
Complete the business setup details required by Meta, such as business name, category, website, and timezone.
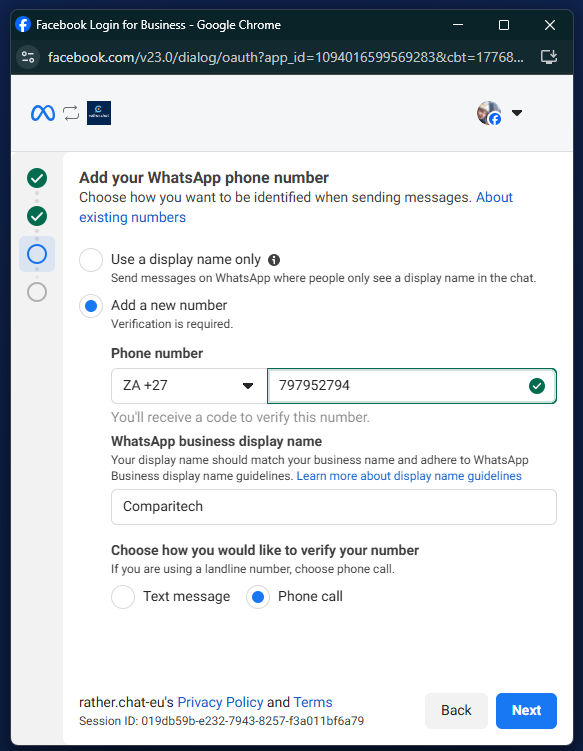
6. Add Your WhatsApp Phone Number
Choose the number option you want to use, enter the phone number details, set the display name, and select how you want to verify the number. Select the Phone call option to receive your verification code. Our system will forward the verification code to the email address you used during Sign up.
Once you receive the 6 digit verification code:
- Enter the code
- Click Next
- On the final screen, click Finish
This completes the process.
Display Name Guidelines
Your WhatsApp business display name should clearly match your real business identity.
Use a display name that:
- Matches your business or brand name
- Is consistent with your website, branding, or public business presence
- Helps customers recognize who is messaging them
Avoid display names that:
- Use generic words or broad category names only
- Use only a location name
- Include promotional slogans or marketing phrases
- Include unnecessary punctuation, symbols, or unusual capitalization
- Suggest official verification when that is not actually the case
- Use Meta product names in a misleading way
As a best practice, keep the display name simple, accurate, and as close as possible to your business name.
For the latest official guidance, refer to Meta's display name help page:
https://www.facebook.com/business/help/757569725593362
Important
- Do not close the browser or popup window before you click Finish
- If the browser or window is closed early, the process will not complete and the integration will fail
✅ What Happens After Connection
When the connection succeeds:
- Your WhatsApp Business Account is linked to the platform
- Your channels are refreshed in the dashboard
- You are taken to the integration success screen
💳 Final Setup After Success
After successful connection, there is still one important setup step to complete in Meta.
You should attach a payment method to your WhatsApp Business Account so messaging can be activated.
- Open Add Payment Method
- Complete the billing setup in Meta Business Manager
The success screen also notes that a member of the RatherChat team may reach out to help finalize setup.
⚠️ Common Connection Issues
I am not an admin on the WhatsApp Business Account
You must have admin access to complete the connection process.My phone number is already connected elsewhere
Your number must be disconnected from any existing WhatsApp account or integration before you can use it here.The connection did not complete
Retry the final connection step and complete the Meta popup again if needed.I chose not to connect right now
You can skip the step and return later from the WhatsApp integration flow.My account is already connected
If the account has already been linked, the platform may show an existing-account state instead of repeating the process.